2. Click on GUIDE icon to open “GUIDE”.


3. The GUIDE Quick Start window will be appeared. Select Blank GUI (Default) and press Ok.
 4. Now when you click ok, you will see a GUIDE window.
 5. Click File > Preferences… to open GUDE Prefrences.
 6. Check first checkbox to show names in component palette, and then click Apply and Ok button.
 7. Now you will see names in component palette.
 8. Save this file as your desired location.
 9. Here I am saving this file as OpenImage. Now friends note here when you save this file for first time, two file will be generated with ".m" and ".fig" extension. For me it will be "OpenImage.m" and "OpenImage.fig”.


10. Now let’s drag and drop push button and axes components in drawing area and adjust them as showed in below figure.
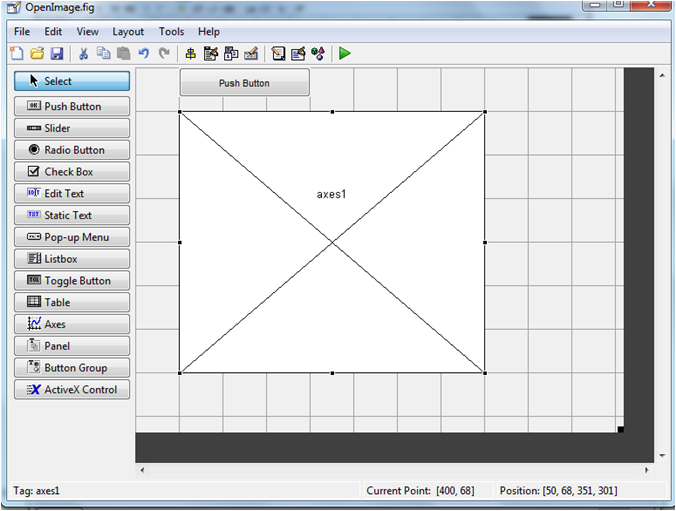
Push Button: we are going to use Push Button as to open file browser for selecting image file.
Axes: we are going to use axes as image viewer which ever image we will select it will be displayed in axes.
12. Now let’s change the Properties of push button according to our function. Keep the cursor on Push Button and press Right Click and select "Property Inspector".

String: Open Image
Tag: open_button

For axes change its "Tag" properties from "axes1" to "img_display"

15. Now as we have set all the properties save the file and switch to OpenImage.m file. Now find the Callback function for "open_button" push button.
 16. Copy paste code below:

[filename, pathname] = uigetfile({'*.bmp';'*.jpg';'*.gif';'*.*'}, 'Pick an Image File');
img=imread([pathname,filename]);
axes(handles.img_display);
imagesc(img);
set(handles.img_display,'Visible','off');
guidata(hObject, handles);

17. Now save and Run file.

No comments:
Post a Comment